Yes friends, there’s still a lot of “make” in makebright.
As I’ve become more nomadic pursuing makebright full-time as a business, I end up hauling a bunch of my gear around on a daily basis. To maintain a reasonably-sized camera bag, I’ve had to naked-carry my laptop. I can jam the power supply, mouse, etc. into the bag, but the laptop has been in hand since August. This worked more or less until the fall rain and late fall sleet/snow. I wanted a minimal laptop sleeve that was water-resistant and not-black, so I decided to make one…
I learned to sew as a kid under the guidance of my mom and grandmother. Mom fabricated terrific Halloween costumes for me and Brohemus, modeling early maker resourcefulness for us. I enlisted my Gram’s help on overly-ambitious “Home Ec” sewing projects from the sixth grade onwards. She had trained as a seamstress, so my free-style designs with no pattern confounded her at first, but her large capacity to Get-Shit-Done took us forward to success, usually with a good deal of hand stitching. Later in high school, all this know-how got applied to altering clothes I picked up in the thrift store on the cheap. This caused some head-shaking in the 1980’s frenzy of materialism, but was more familiar to the older generations of the family who had know tougher times. I just wanted unique clothes.
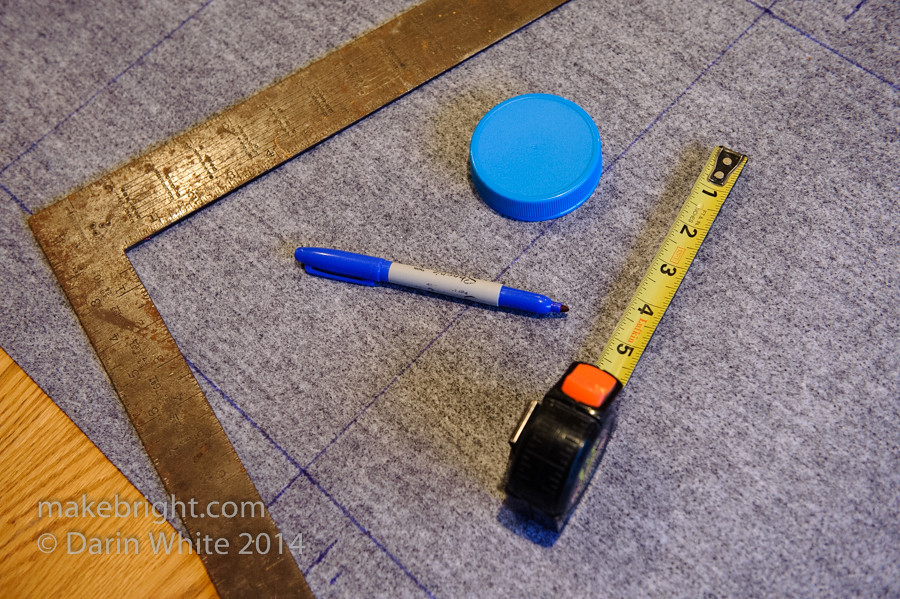
My toolset above may be atypical of most textile makers. A framing square, Stanley tape measure and Sharpie for layout are the ticket for me.
If you don’t know about it, Lens Mill on Moore Street is where all textile projects begin. This place is an old-school gem and maker paradise. I strongly encourage you to take a consumer-material-science walkaround in Lens just so you’re aware of what’s available.
I knew I wanted some sort of vinyl cover for my laptop, but I also needed something that would provide a bit of structure. This material shown above… I can only describe as car floor mat. You could use this as a structural element in all sorts of things like costumes and at $8/yd it’s no doubt cheaper than purchasing replacement floor mats.
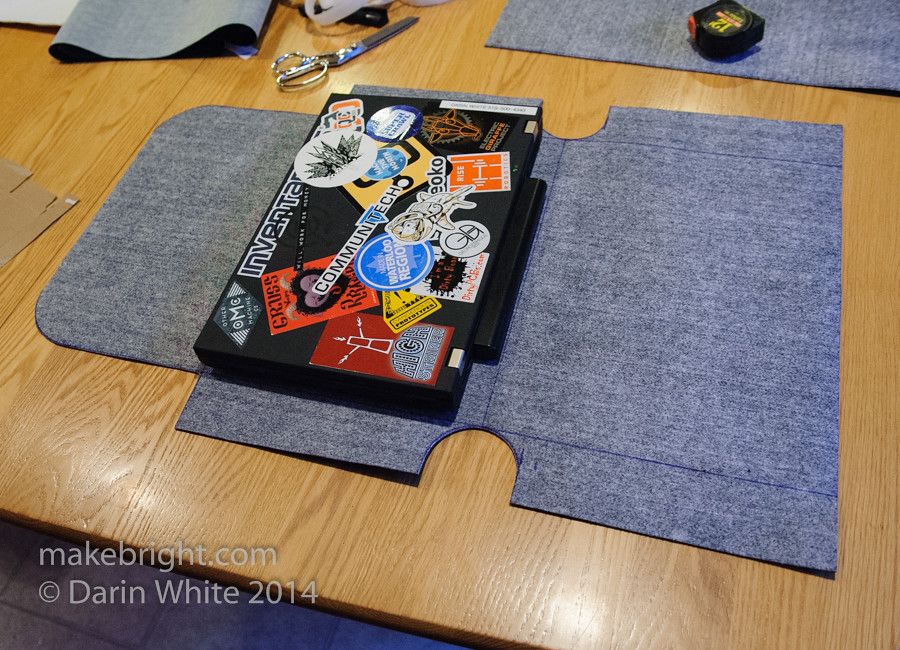
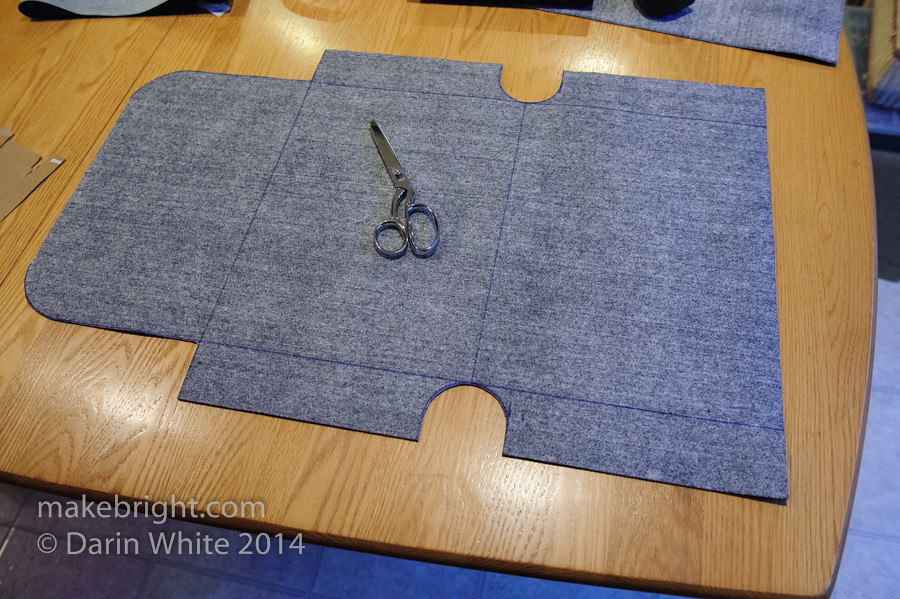
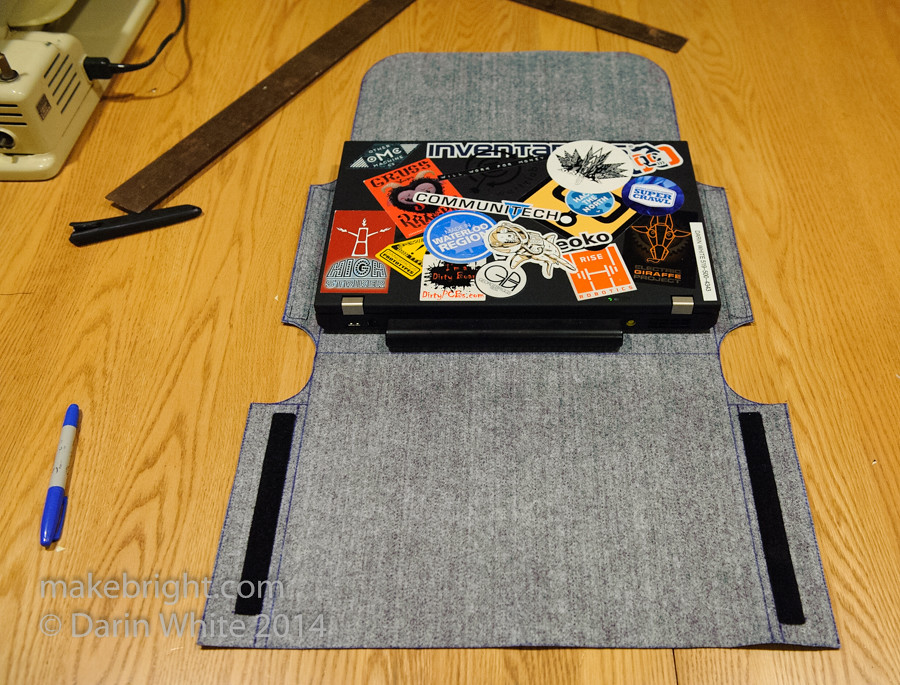
I wanted a custom fit for my laptop, so I just started building around it, allowing for folds, seams, measuring tolerances, and some wiggle room. This design is sort of a simple fold-over envelope. The heavy nature of this material combined with the way I wanted the inside finished didn’t allow for the usual stitch on the inside and then turn right side out approach. So…
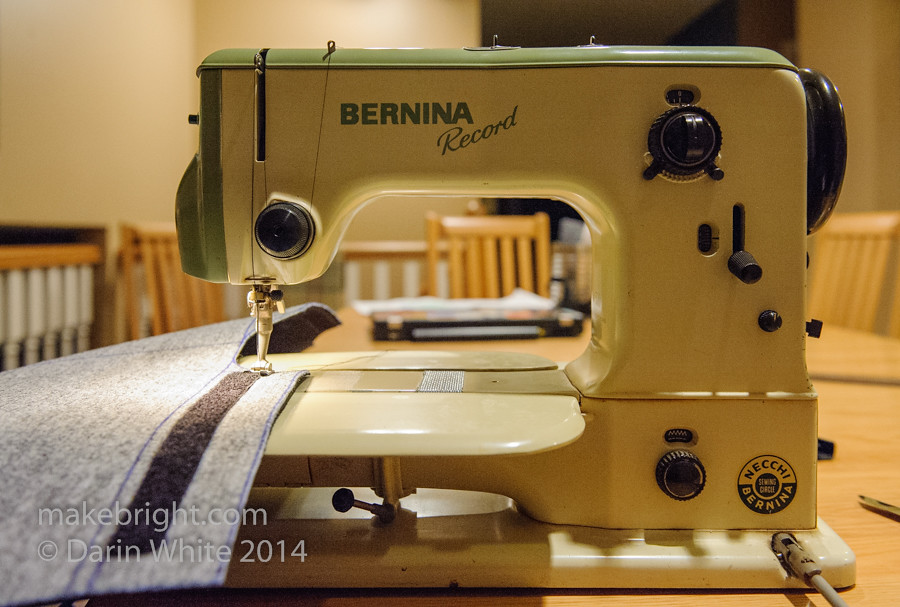
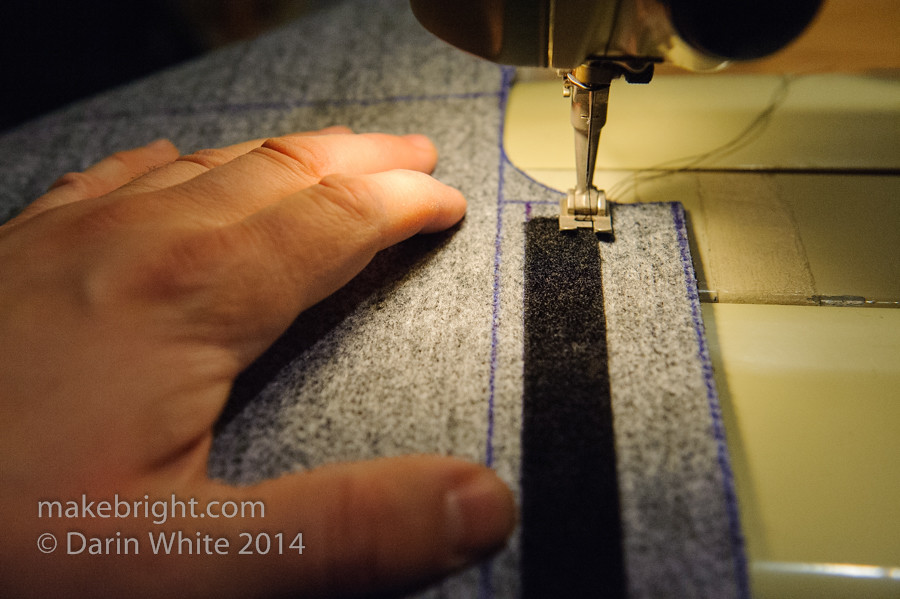
I decided to employ what I’ll call one-time-use-velcro to provide strong sides to the envelope. This is one of my favourite tools: my Gram’s Bernina Record 530 sewing machine. It is certainly a good deal older than me, weighs a tonne, and can sew just about anything.
With the velcro sewn on, it was time to…
fold up and check for fit. The corners are open, but this is just the inner shell.
The margin beyond the velcro left this undesirable flap, so…

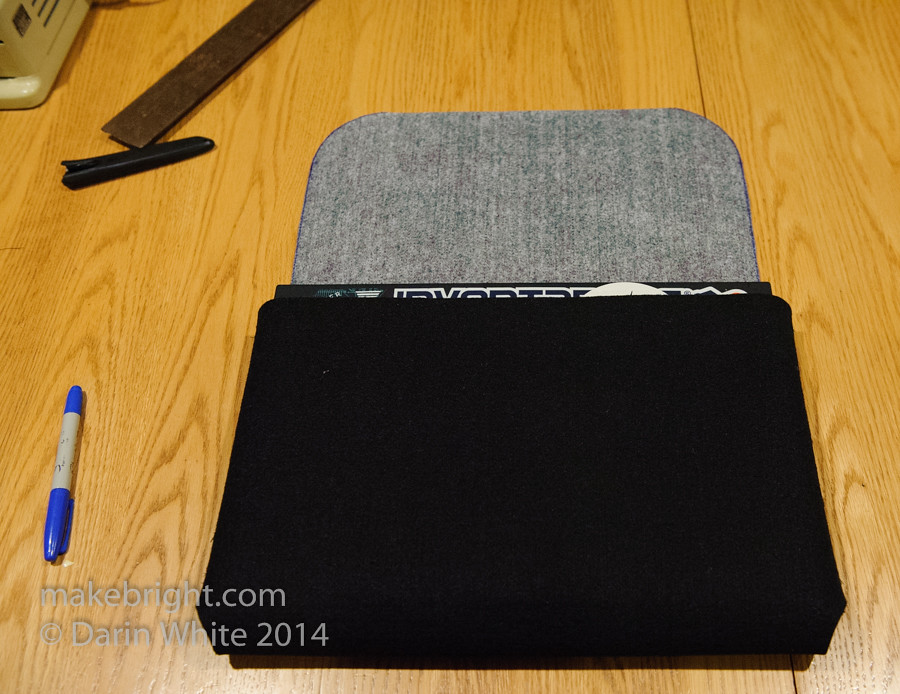
I did a heavy reinforcing stitch at the top of the bag with the machine, and then whip-stitched by hand to give…
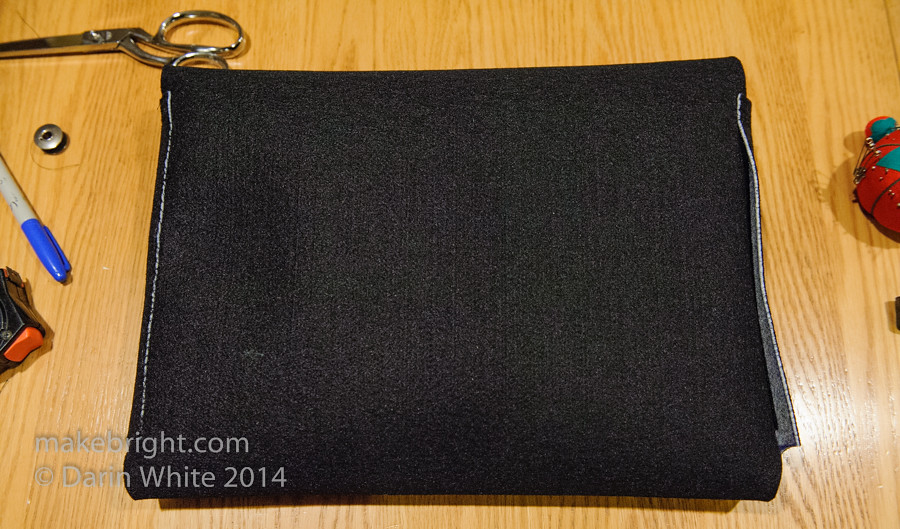
the bag a better shape.

Here’s the Daytona Orange vinyl case for the outer shell. This material is typically used for car upholstery. Because it is thinner, I was able to do the conventional machine stitching on the inside, so I allowed for that in the cut-out.
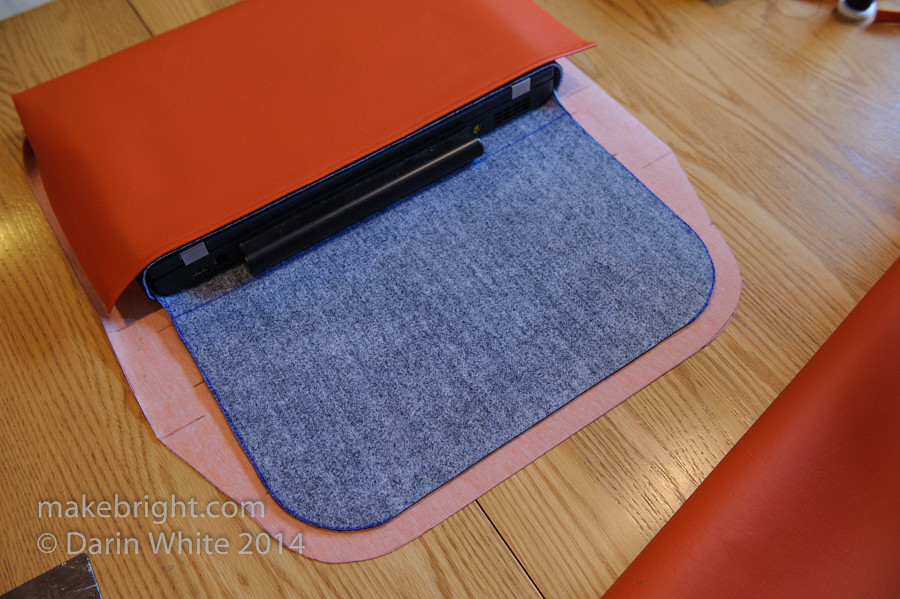
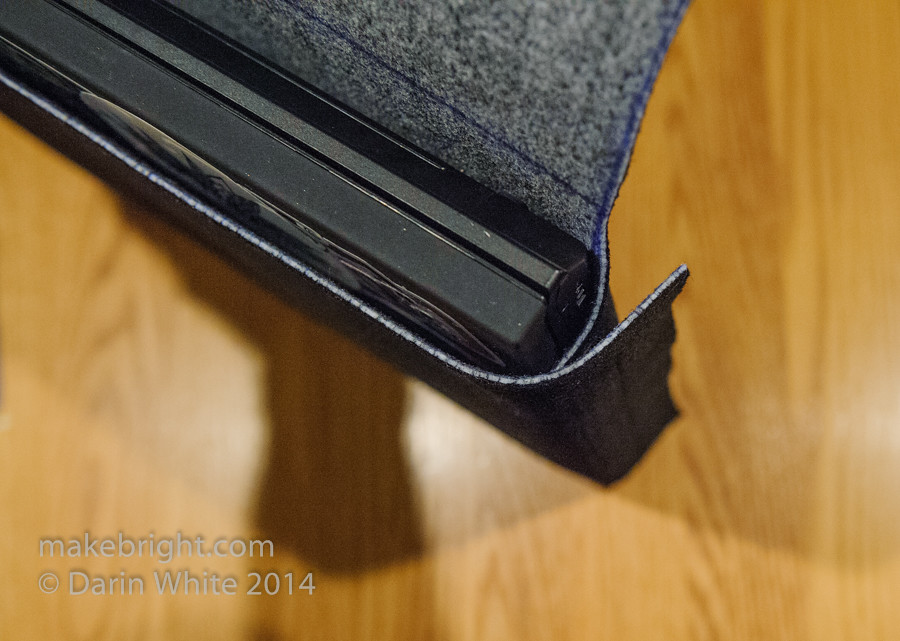
I flared out the casing vinyl at the fold so that when the flap is shut…
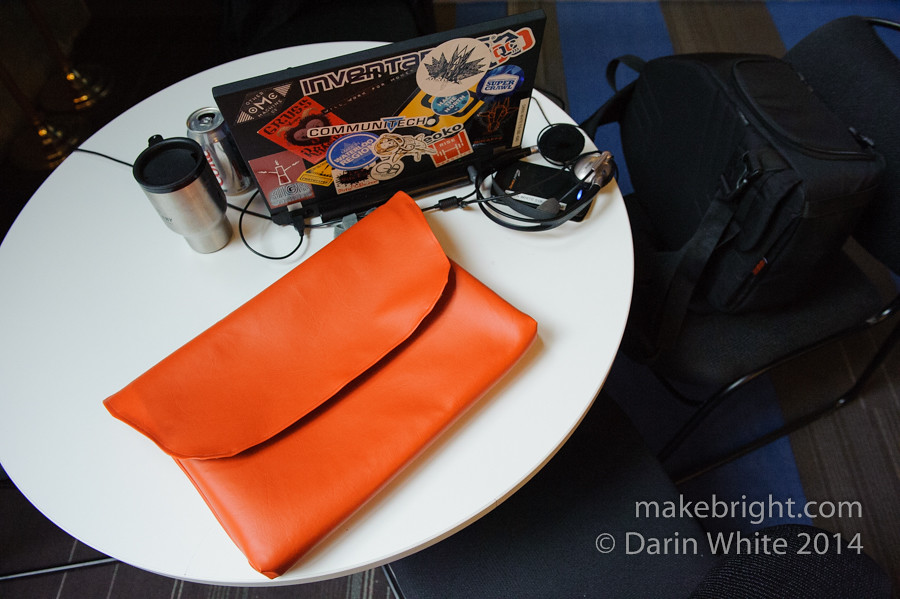
it keeps the weather out of the top of the sleeve. I’m pleased with the way this turned out, and especially with the perfect custom fit. I’m not great at sewing, but I don’t fear tackling it, and I get better on every project. Super-useful toolset in the makerly toolbox of life.
DW
Nice work! The pattern looks like it was made by an engineer. Very precise.