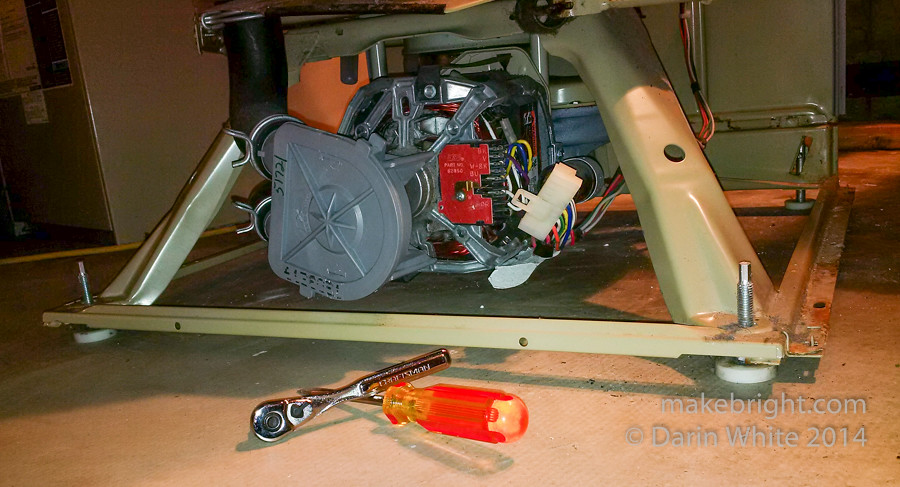
This is not the hyperdrive on the Millennium Falcon. It’s the pump/motor/transmission on my washing machine. I got the shouted call from the basement last Sunday akin to “Houston, we have a problem” except worse: “Water on the floor, machine sounds like screws in a blender!”
A couple of reasons prompted me to write about this inflection point. The first is my on-going advisory efforts around the UW maker study I wrote about back in March. What are the social effects of enabling people with hands-on skills and tools? The second is an invitation to contribute to a February makerly workshop with the GreenHouse crew at St Paul’s College at UW. Approaches to prototyping with students.
Endeavours in the make-o-sphere often require unlearning of models and behaviour that block exploration and Getting Shit Done. Consumer-cultured responses to a broken washing machine might include (a) “I could never understand what’s going on inside this shiny white box” (b) “I might *really* break it if I get in there” (c) “I don’t have time to fix this myself” (d) “I could get hurt if I crack this thing open” and so on.
I’ll offer an observation that Gus made back when we were creating kwartzlab: it is a made world. Almost everything we see is made by people and also repaired by people. It is not alien technology. When we fear what’s inside the box, we prematurely abort exploration and our makerly muscles atrophy. Some of the mental blocks noted above do have a degree of truth, but we can’t let them prevent us from being capable, resilient, resourceful, and curious actors in the world.
Home appliances are probably one of the best-documented repair domains in your home. Online forums are jammed with descriptions of problems and diagnostic methods. YouTube is chock full of step-by-step repair videos. If you need a financial motivation to roll up your sleeves, know that it’s $80 just to get a repair technician to your house. Then there are parts and labour costs from there.
Two screws on the hinged front panel release it for flip up. What have we got here?
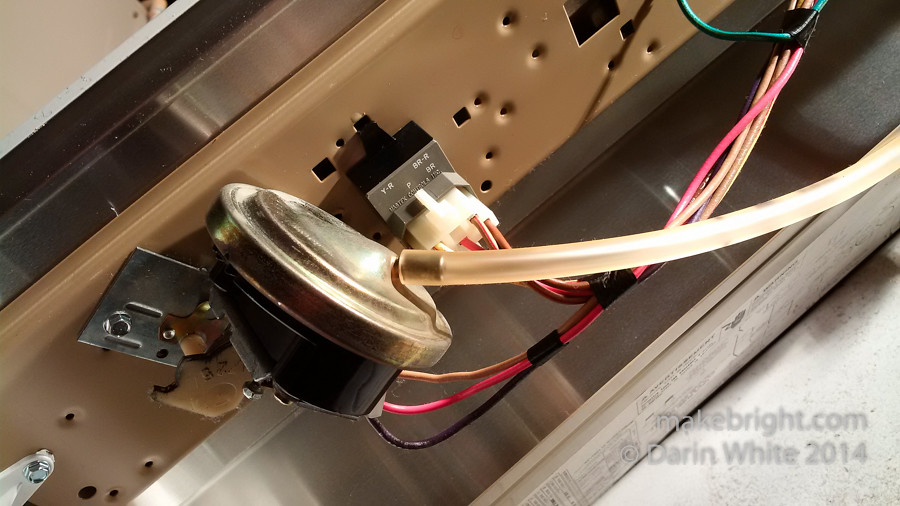
This diaphragm-looking thing with hose is connected to the Low-Mid-High water level dial, so presumably this tells the machine when to stop filling the tub with water.
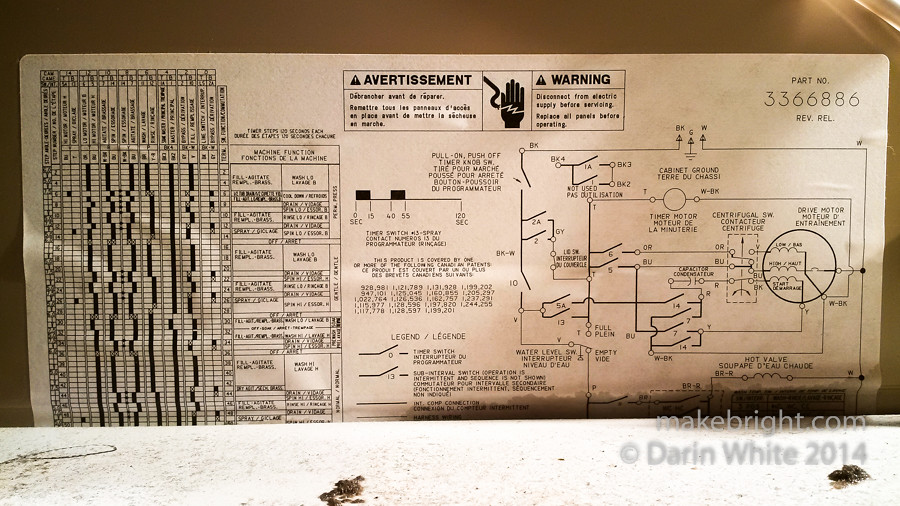
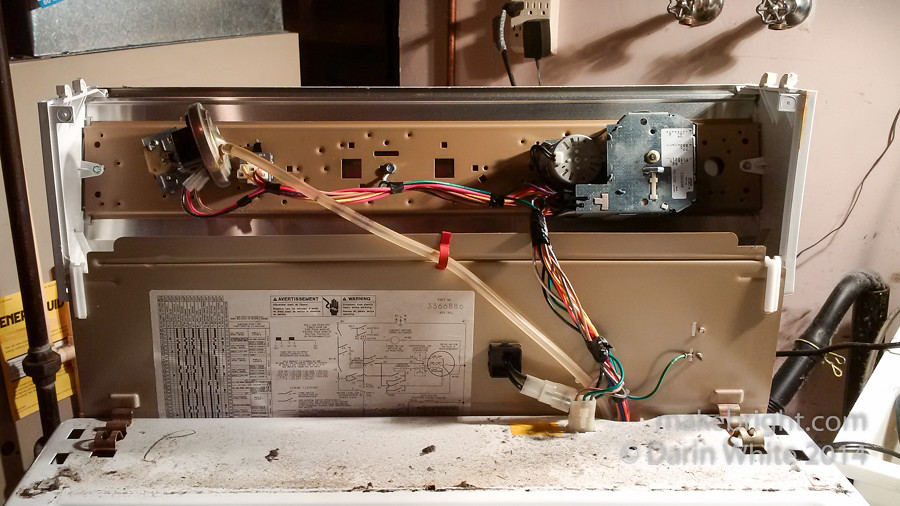
Built-in diagram and table to tell you how this machine operates. Excellent. Wish all devices had this info.
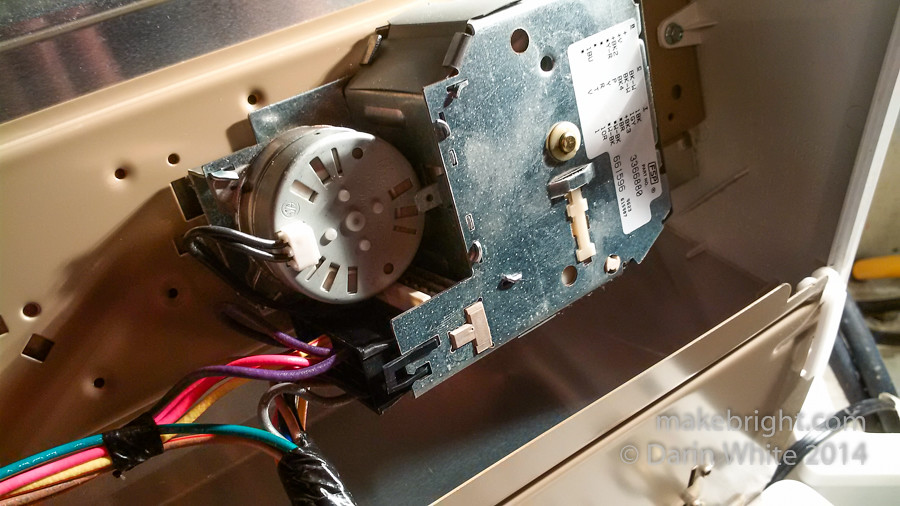
The timer unit that controls the various stages of wash: fill, agitate, rinse, spin, etc. That round thing is characteristic of an AC-powered motor. It probably spins at a given speed, driving a gear train with cams that sequentially switch on pumps and valves and motors. This assembly is well-labeled with a part number and can be removed with a couple of screws if it needs replacing.
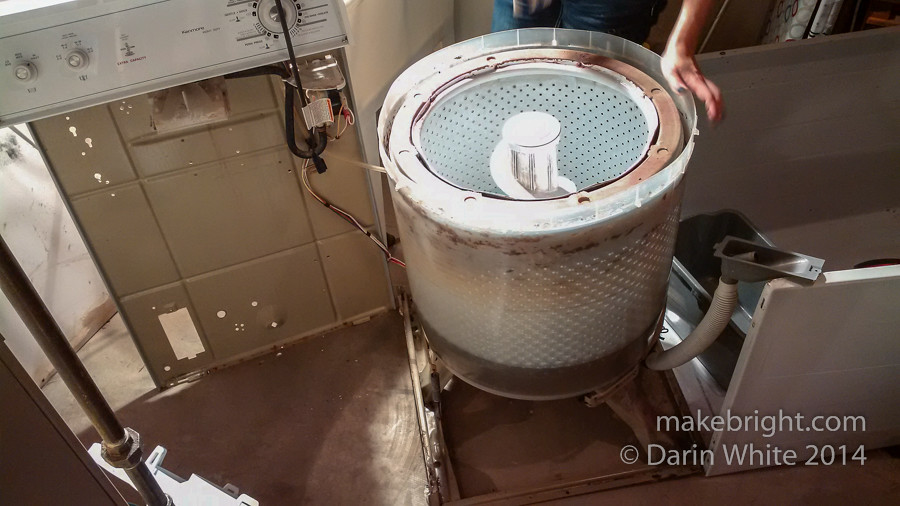
Popping a couple of clips on top of the machine with a screwdriver allows the whole three sides and top of the washer to flip forward revealing the guts. Since we had water on the floor, I wanted to check the hose connections and pump for leaks. I wanted to also check the plastic tub for cracks. That all checked out. No obvious leaks.

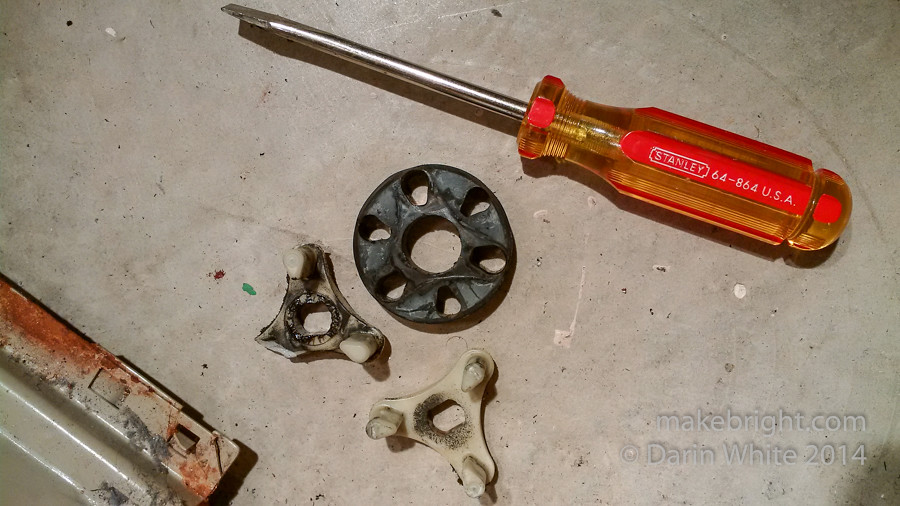
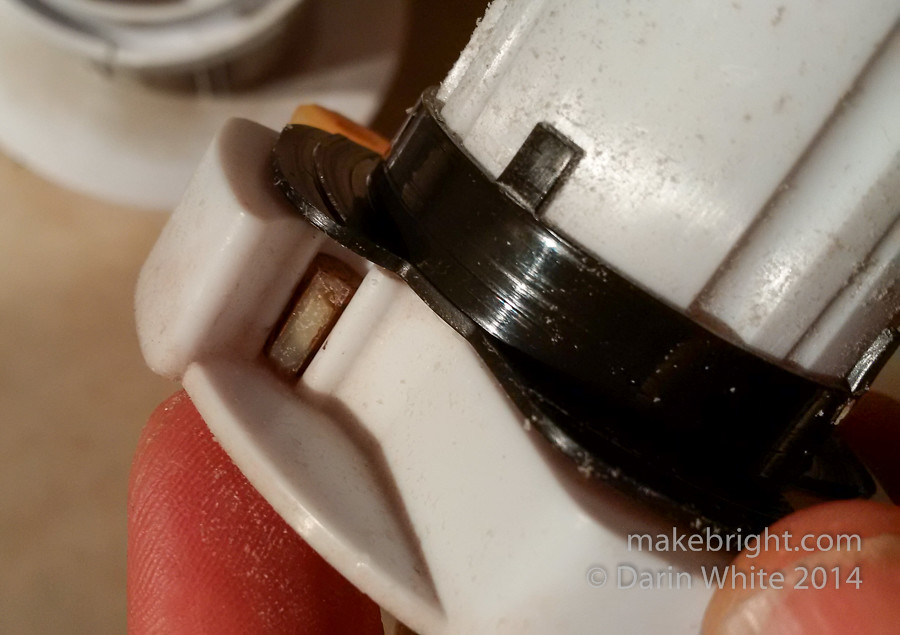
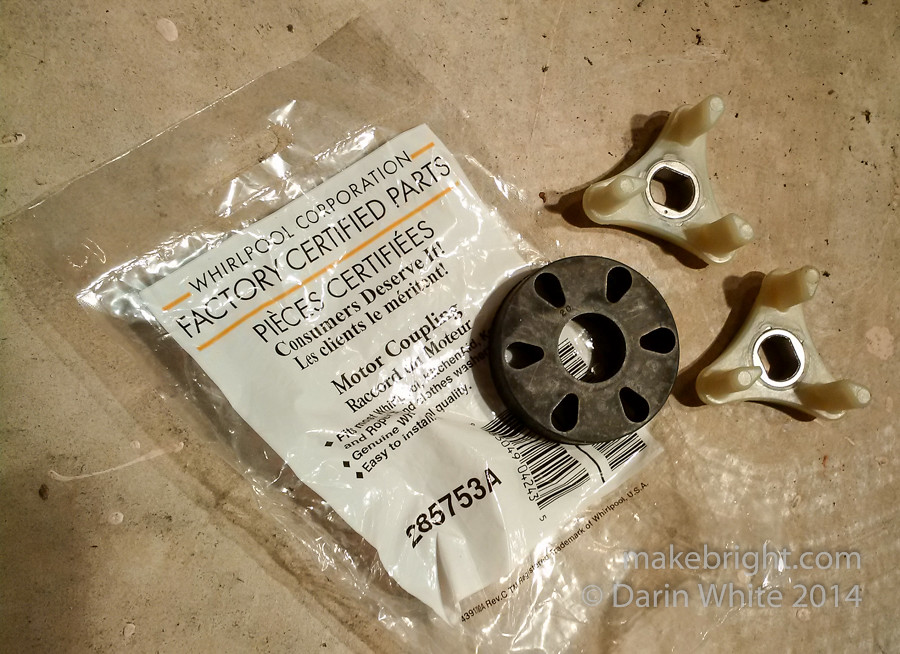
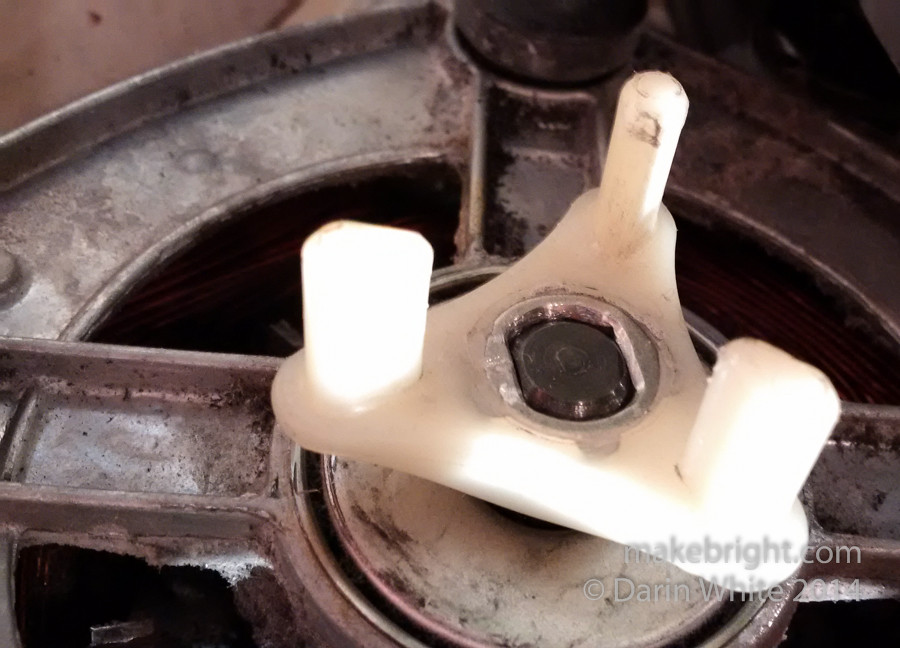
Got some incidental cleaning done since this hasn’t been cracked open since 12 years ago when the motor/transmission coupling vaporized when the drum got jammed. Speaking of that motor coupling, I found a broken and somewhat familiar plastic part under the washer, and sure enough…
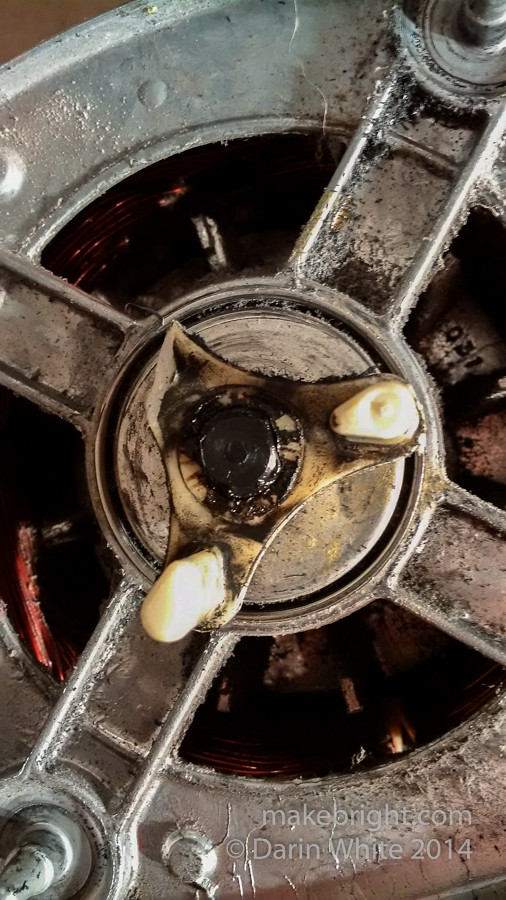
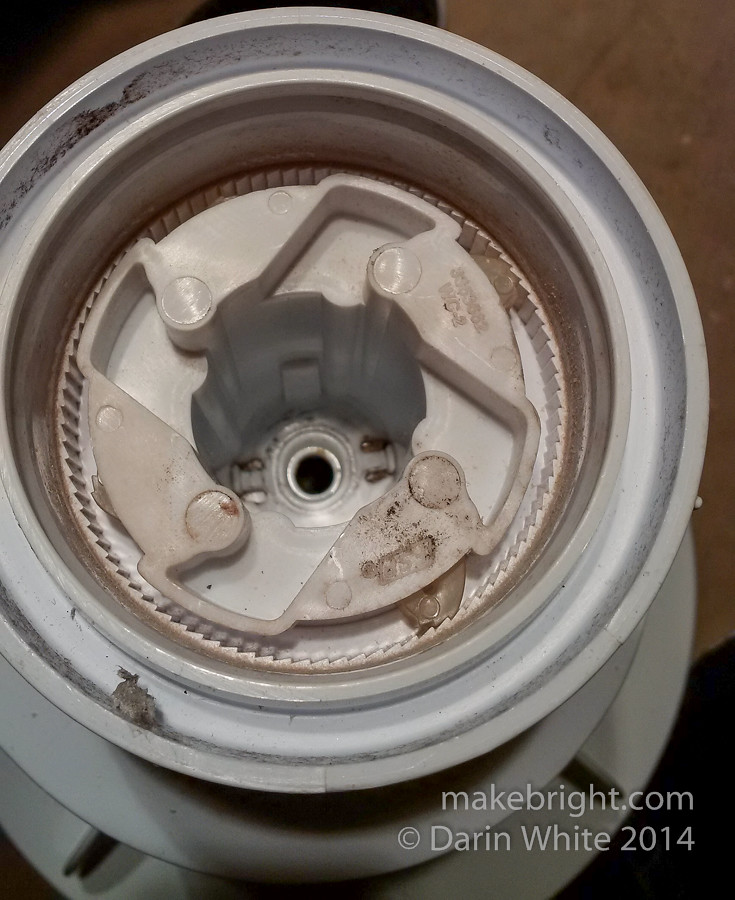
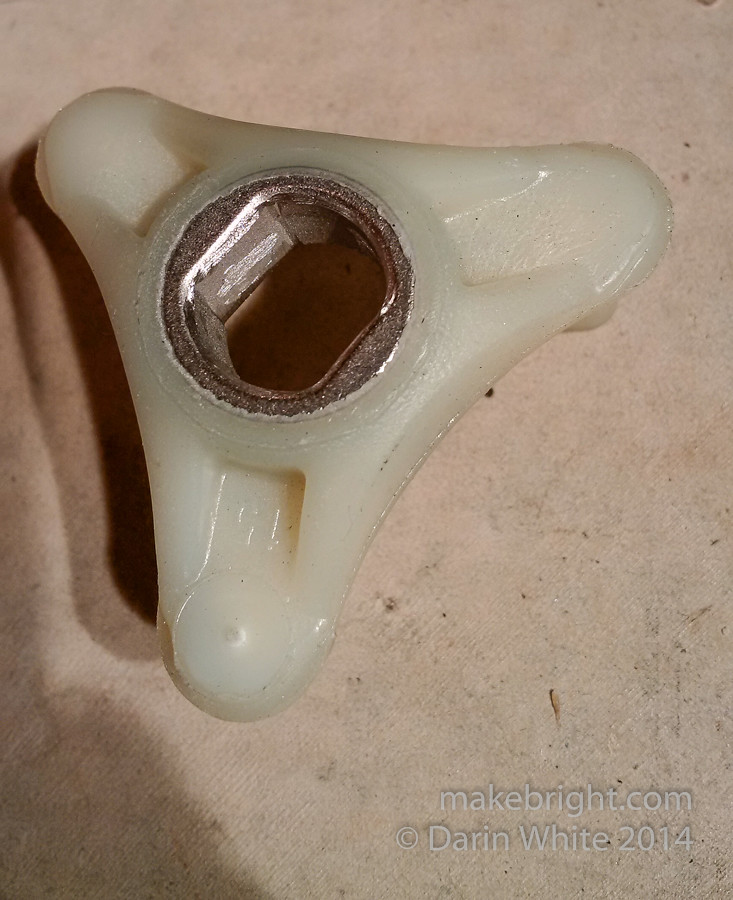
when I pulled the motor off I found one of the teeth broken off the motor coupler. The repair kit for this is about $17. This plastic part just presses on and pulls off the motor shaft. It mates with…
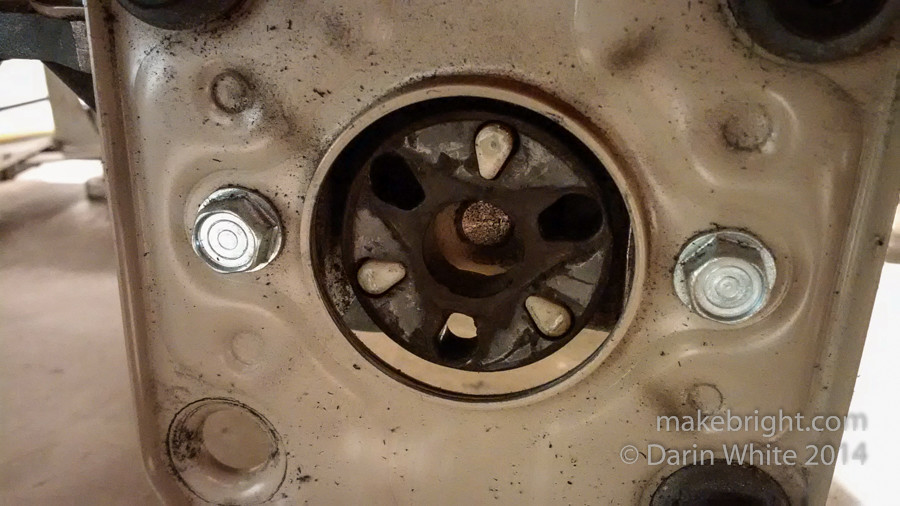
this complementary plastic coupler and rubber ring, here on the transmission which gears down the motor spin and bends it 90 degrees up to connect with the wash tub.
Pulled this all out to take to the parts store in search of replacement. So this didn’t explain the water leak problem, but it had to get fixed anyway before total washer failure. While looking into the leak problem I noticed…

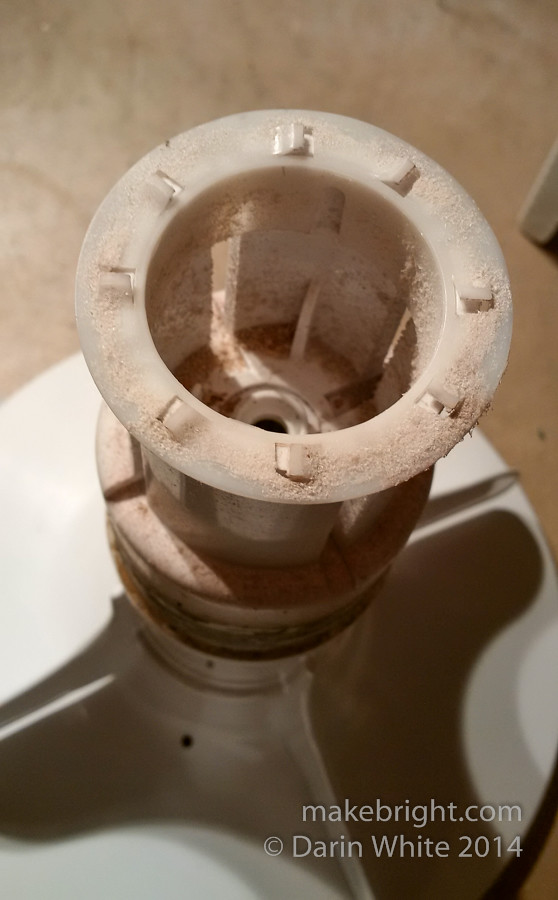
the so-called dual action of the agitator was really just a single action. The top part of this agitator is designed to spin in one direction and augur the clothes down to the lower agitator. I observed that the augur was really just spinning in both directions freely. Some googling quickly educated me on something called “agitator dogs” and how to very easily replace them. Popping this lid off the agitator…

showed me the source of the horrible rattling noise. Down in the centre well of the agitator I found…
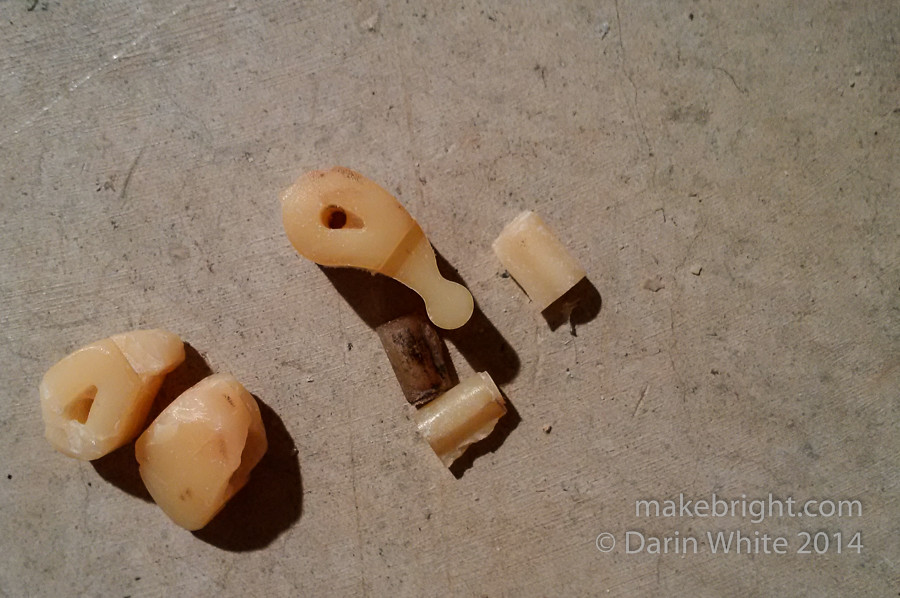
these bits of broken plastic. A ha! The agitator dogs.

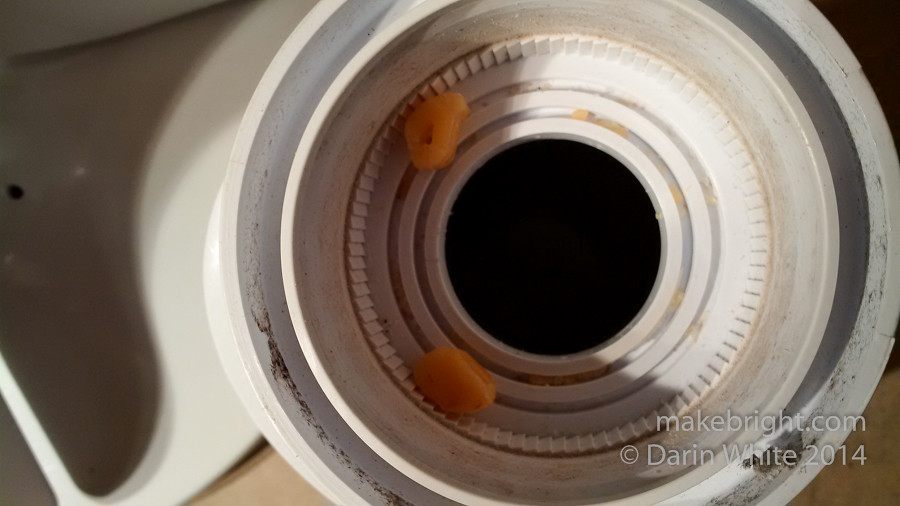
Apparently, these get worn, like this one (the orange bit), and don’t grab the sides of the agitator for the awesome ratcheting effect. Removing that one bolt down in the agitator well allows…
the removal of the…

agitator and…
a quick pull on the top part pops it apart, allowing you to…
dump the loose dogs and…
slide up the retaining ring to remove the dog fragments still in place. Before heading off to the parts store…
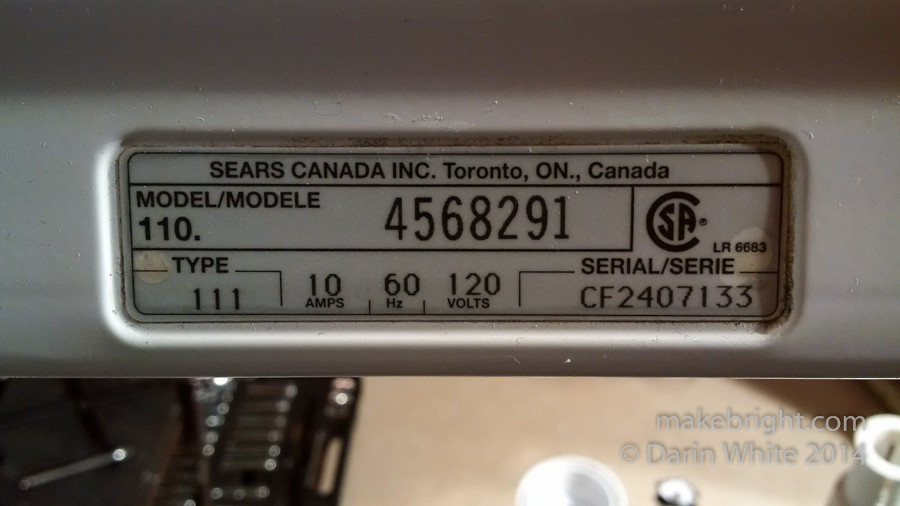
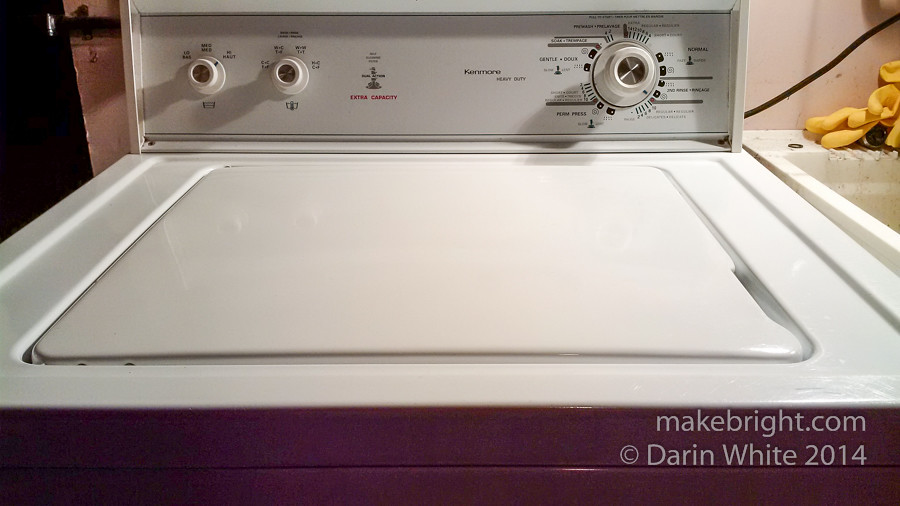
I grabbed the model number which is found under the lid on the main body. For the purposes of buying parts, the marketing stuff you see labeled on the front panel isn’t helpful. You really need this info pictured above. Model 110.4568291. This washer is direct-drive with the motor coupling. Other models are belt-driven. I’ll mention that washer model numbers are different in the US versus Canada, for those of you googling.

I typically buy parts at ReliableParts down on Frederick at Victoria.
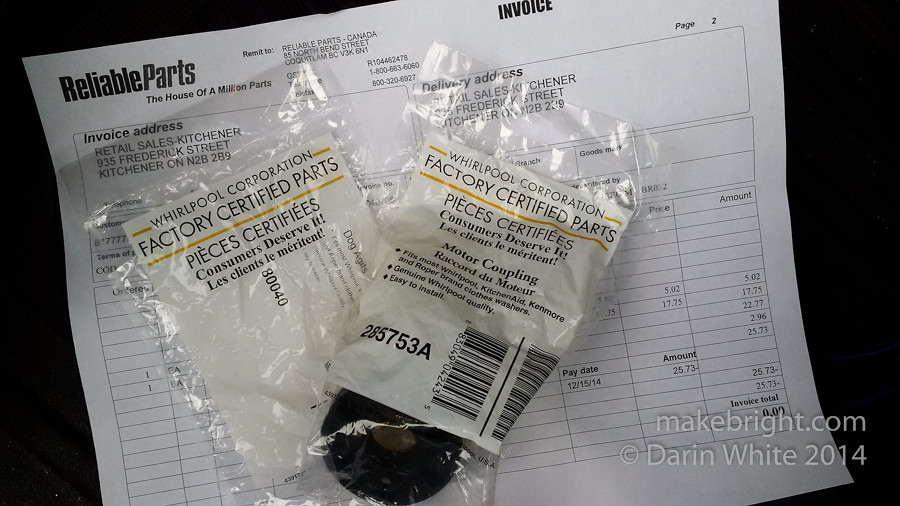
All in, the two kits were $25. Much better than an estimated $250 for a service call.
New dogs installed and tested in 5 minutes flat.
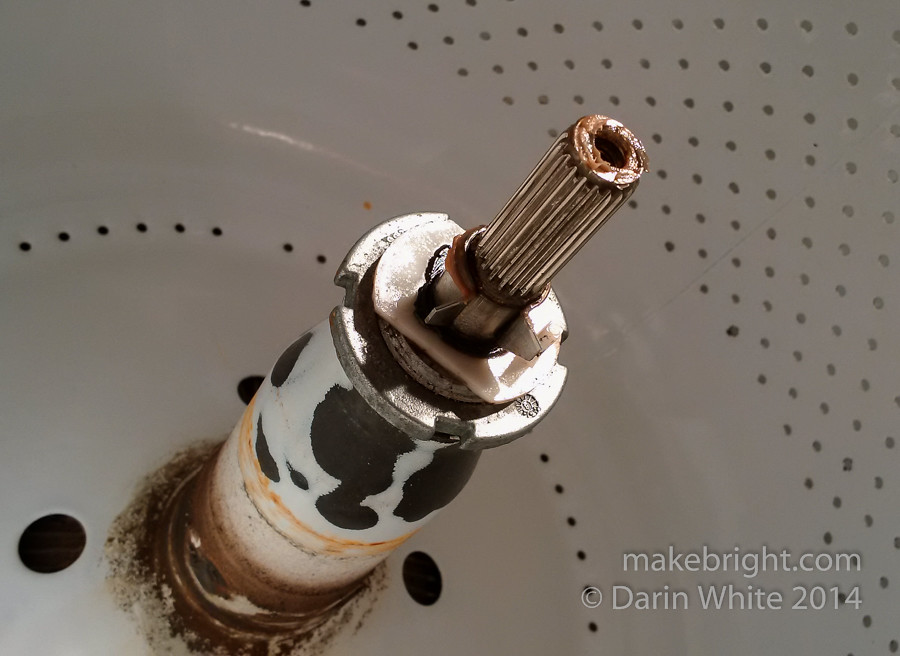
Then I hit a snag with the motor coupling. The replacement parts had metal collars instead of all plastic. They are supposed to just slip over the motor and transmission shafts, but they only were going halfway on. You’re supposed to use a screwdriver, turned around so the handle is up against the collar, and then hammer the fitting into place.
A moderate amount of hammering didn’t work, and with these bits only half-seated, the motor and transmission weren’t mating properly. They were too far apart. I noticed a couple of issues: the old plastic part had a much more aggressive chamfer than this new part. The chamfer accommodated the motor shaft where it starts to flare out. The new part also had some raised metal dimples, presumably to ensure a tight press-fit, only in this case it was too tight. I solved both problems by using a Dremel rotary tool to file away a bit of the metal. The point is you need to adapt and improvise in the course of makerly explorations.
Success. Modified motor couplers in place. Motor reinstalled with two clips and two screws. Washing machine buttoned back up and tested. All good. Some further basement investigation revealed the source of the water (now fixed), but I’ll keep you in suspense for a follow-on post on that.
Makers are enabled by a mindset as much as by a toolset or skillset. “I’ll just figure it out.” The more you tackle repairs and builds, the more you learn, the more capable you become, and you progress in your explorations in an awesome makerly feedback loop. The biggest limitations on thinking with your hands lie within you.
DW
Hang on, you didn’t 3D-print the replacement parts, or use that fancy XYZ CNC machine? 😉
My side-loading machine recently had the pump impeller shred itself and was making similar “blended screws” noises. I think I got my replacement parts from the same store – no, I didn’t 3D print them either 🙂
Mine didn’t have quite such nice info inside, but a web search turned up the maintenance manual.